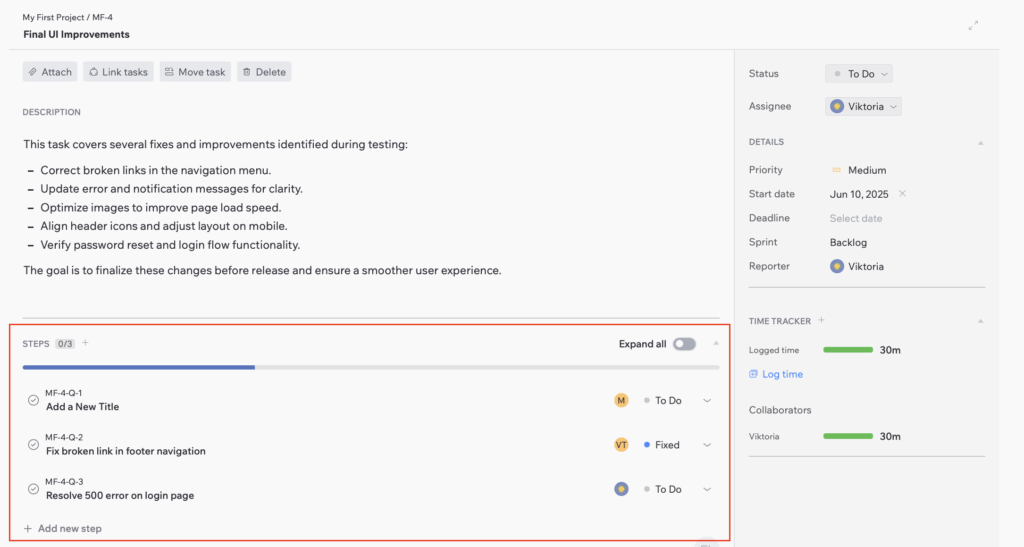
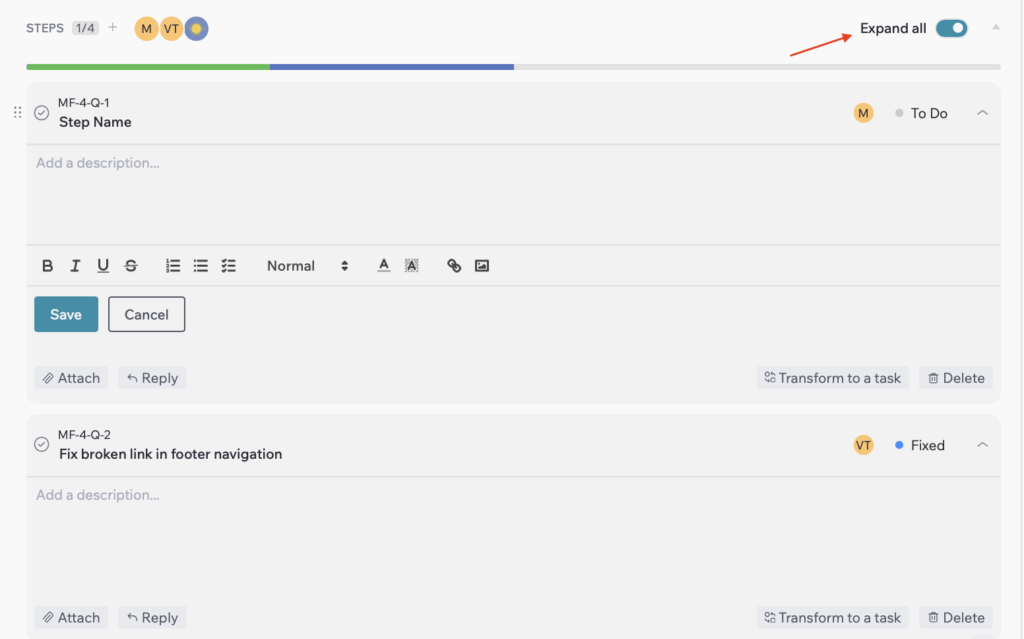
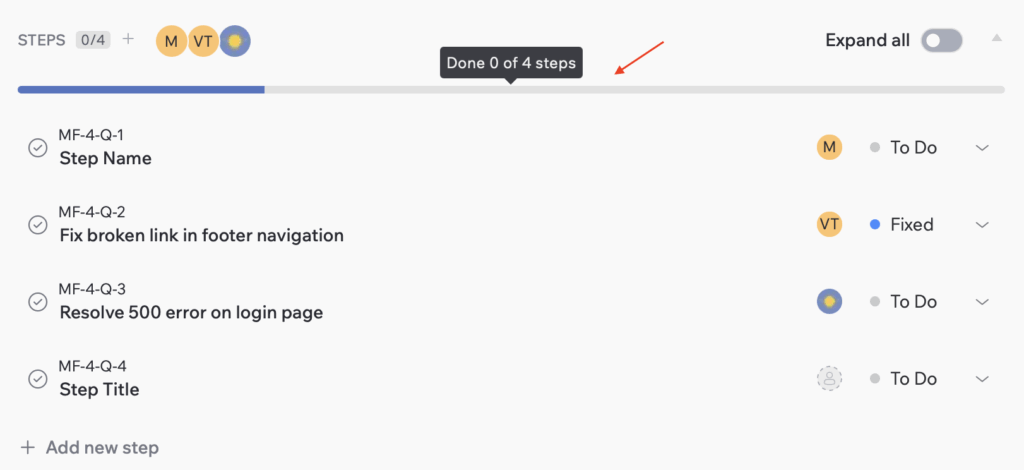
Steps
The Steps is a block on Task page and Quick View page. It allows you to break a task into smaller items or track bugs directly inside the task.
From this page you can:
- Add steps for sub-tasks or bugs.
- Assign them to different teammates.
- Expand all steps to review details.
- Reply to each step.
- Monitor overall progress with the progress bar above the list.
How To Create Step
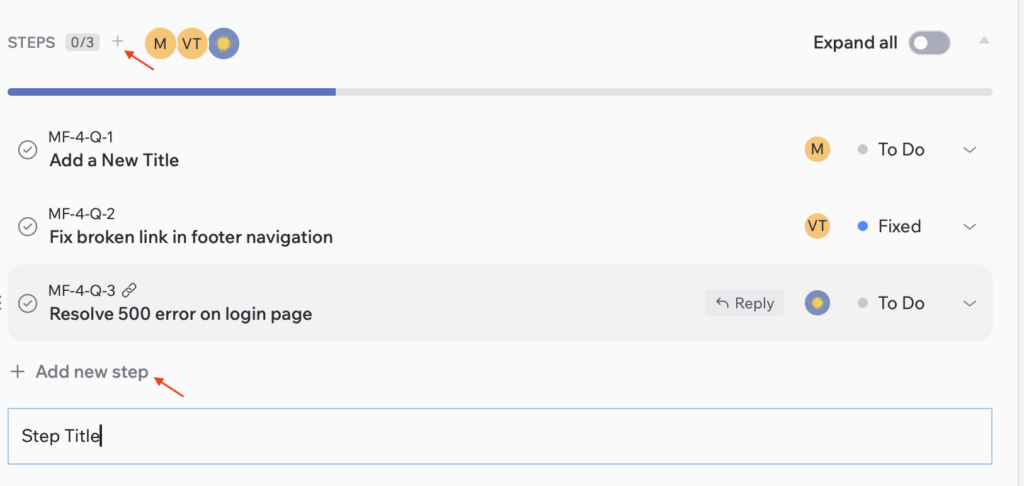
1. Open the Steps block:
- Open the Task Page or Quick View page.
- Scroll down to the Steps block.
2. Click on “+” above or below the block.
A title field will appear – enter a step name and press Enter on your keyboard.
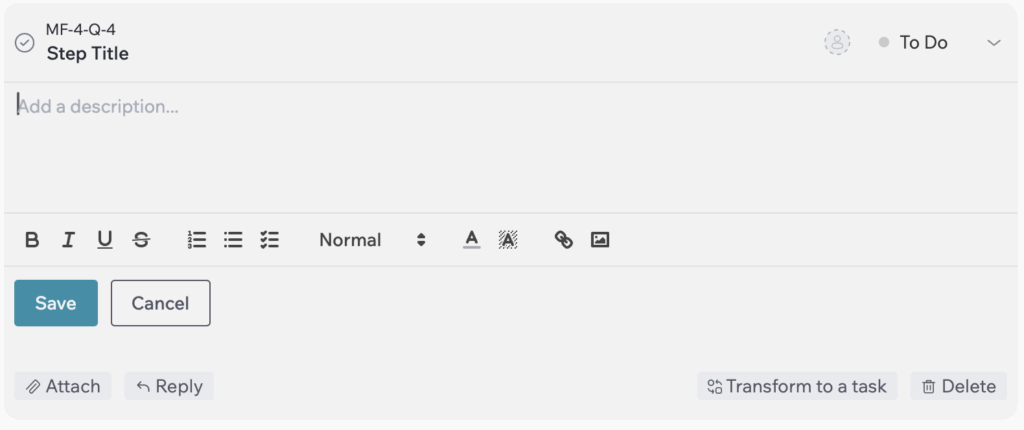
3. Add Step details:
- Description – you can format text, attach images, and include additional links.
- Assignee – select the user responsible for the step. Each step has its own assignee, set independently from the main task. Steps without assignees are marked as Unassigned until updated.
- Status – choose one of the following: To Do, Fixed, or Done.
After filling in all required fields, click “Save” to add the step or “Cancel” to discard changes.
By default, each step is collapsed. You can expand or collapse a step by clicking anywhere on its row. The “Expand all” button lets you open every step in the list at once. When turned on, all steps expand to show their descriptions, attachments, and details.
How To Edit Step
1. Title
Click on the step name to enable editing, make the necessary changes, and then click anywhere outside the field to save. You can also expand the step and update it in the same way.

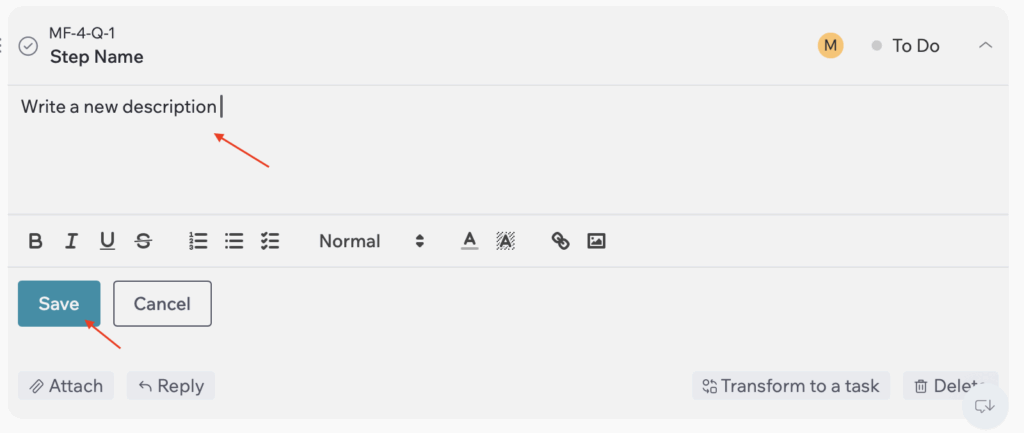
2. Description
- Click on the step you want to update – it will expand.
- Click on the description field, make changes, and then click “Save” to apply or “Cancel” to discard.
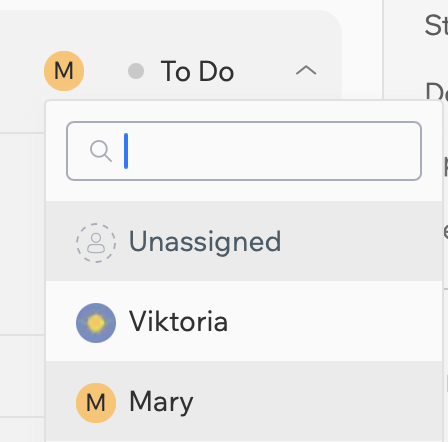
3. Assignee
- By default, every step is created as Unassigned.
- To assign or reassign, click the profile icon in the step line.
- Select a teammate from the dropdown list.
- Once selected, their avatar will appear on the step.
4. Status
Each step has its own status, separate from the main task. To update it, click on the status field in the step line and choose one of the available options.
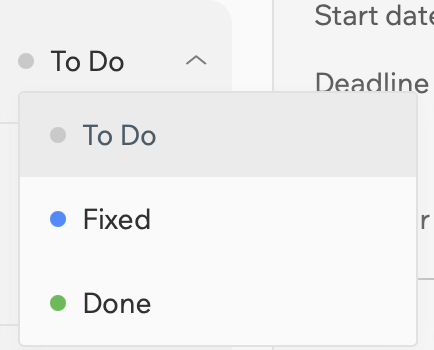
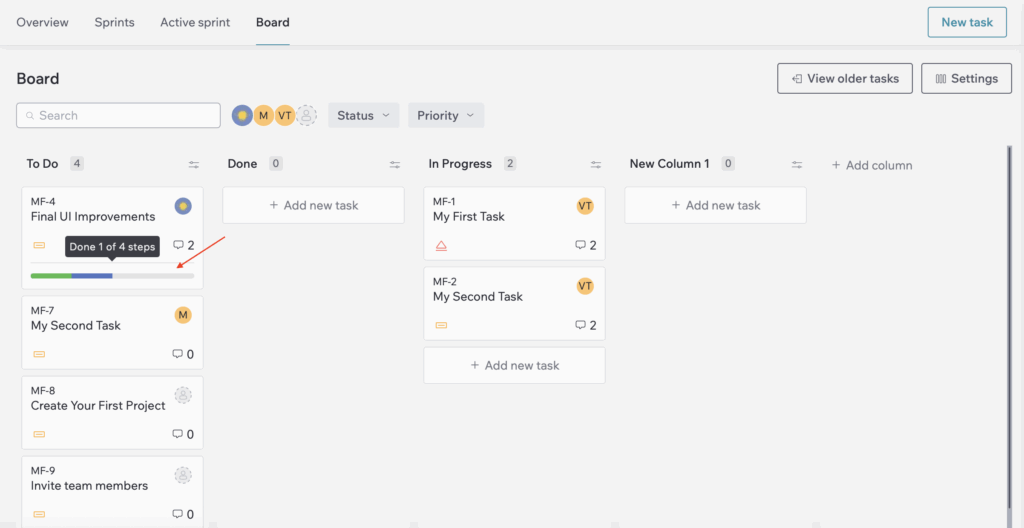
The status updates instantly and the progress bar above the list refreshes to reflect the current distribution of steps.
This progress bar also appears on the Board Page, at the bottom of each task card, so you can quickly see how many steps are Done (green color), Fixed (blue color), or still To Do (grey color) without opening the task.
How To Complete Step
If you’ve finished working on a step, you can mark it as Done in two ways:
- Change the status: click the status field in the step row and select Done.
- Click the checkmark: use the round check icon in front of the step name.

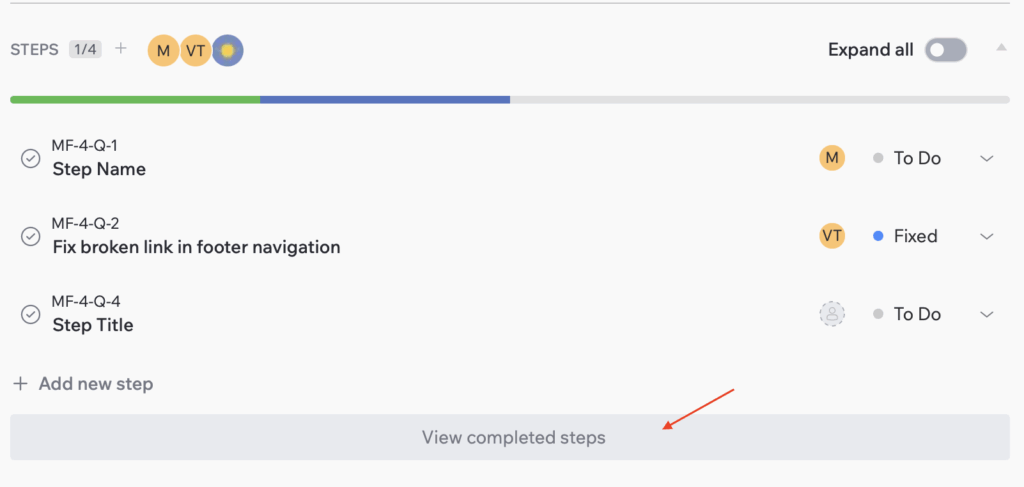
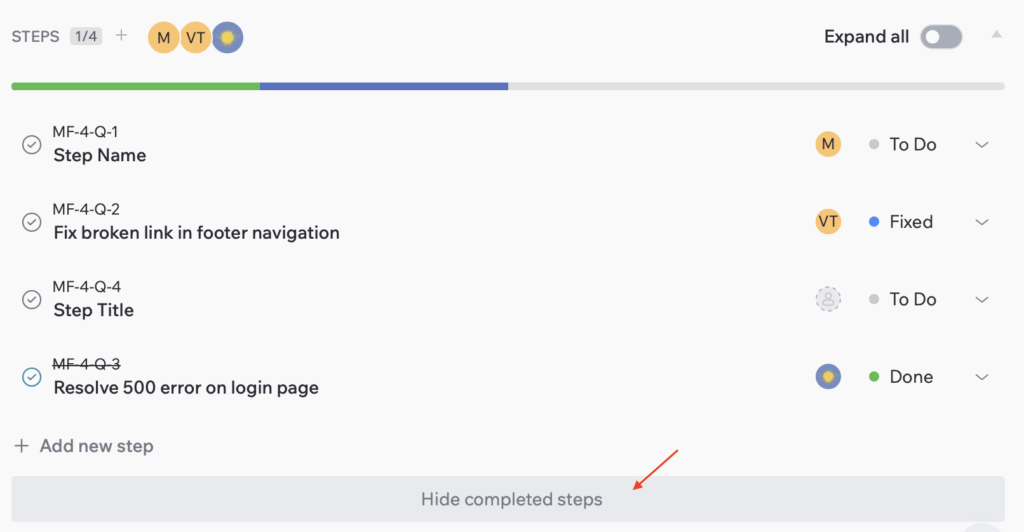
It disappears from the active list and automatically moves to the bottom under the completed steps section.
You can view them by clicking “View completed steps” at the bottom of the block.
To hide them again, click “Hide completed steps”.
How to Reply to Step
You can leave a comment on any step to give feedback or add extra details.
- Hover over the step – the “Reply” button will appear on the right.
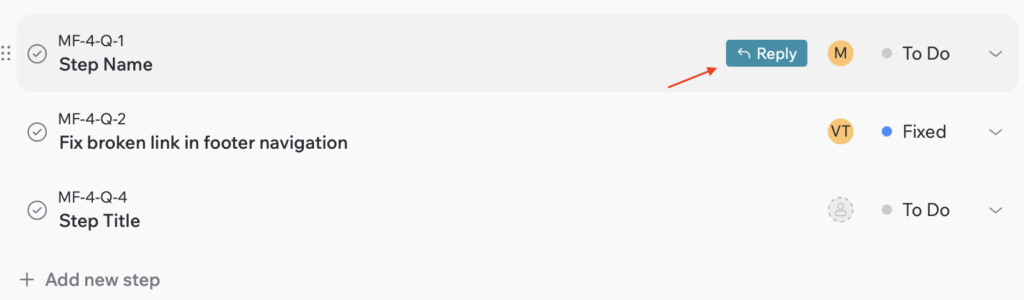
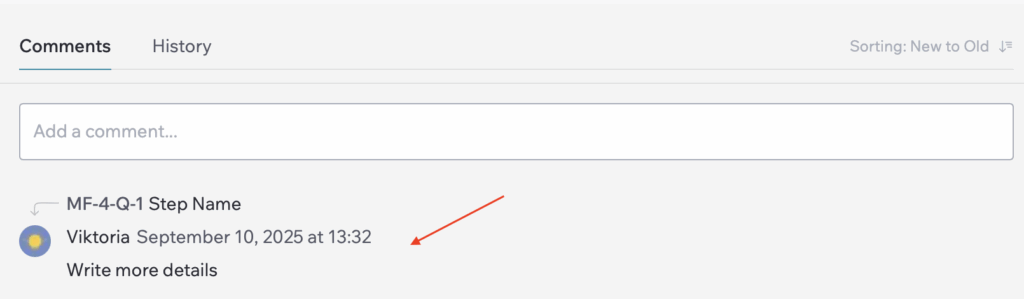
- Click Reply – the page scrolls down to the comments section.
- A field opens with the label “Replying to [Step key + Step name]”.
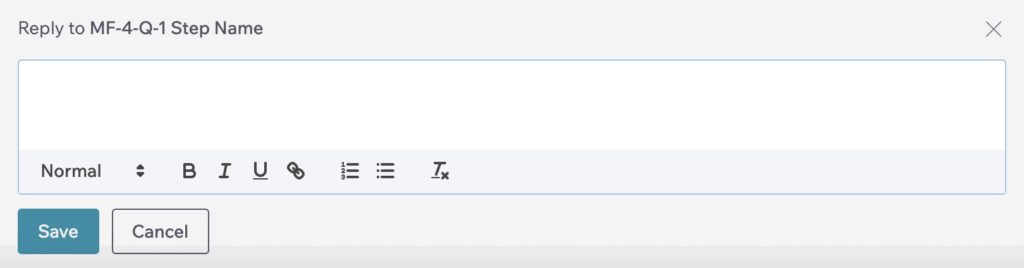
- Type your comment and click Save or Cancel.
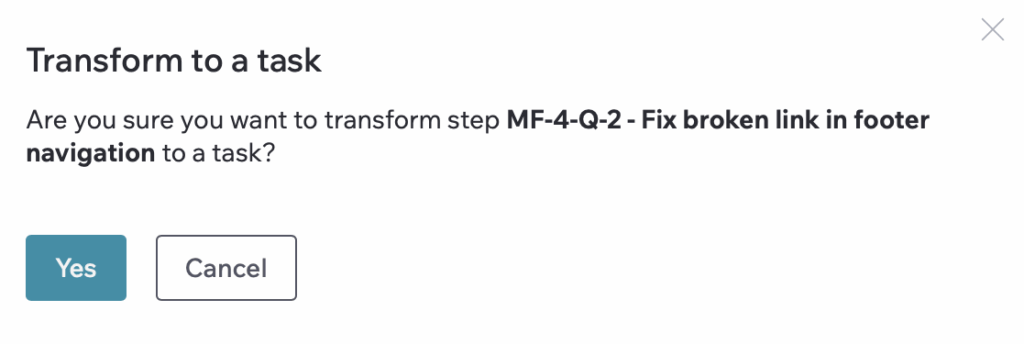
How To Transform Step Into a Task
If a step becomes large or requires more detailed tracking, you can convert it into a full task.
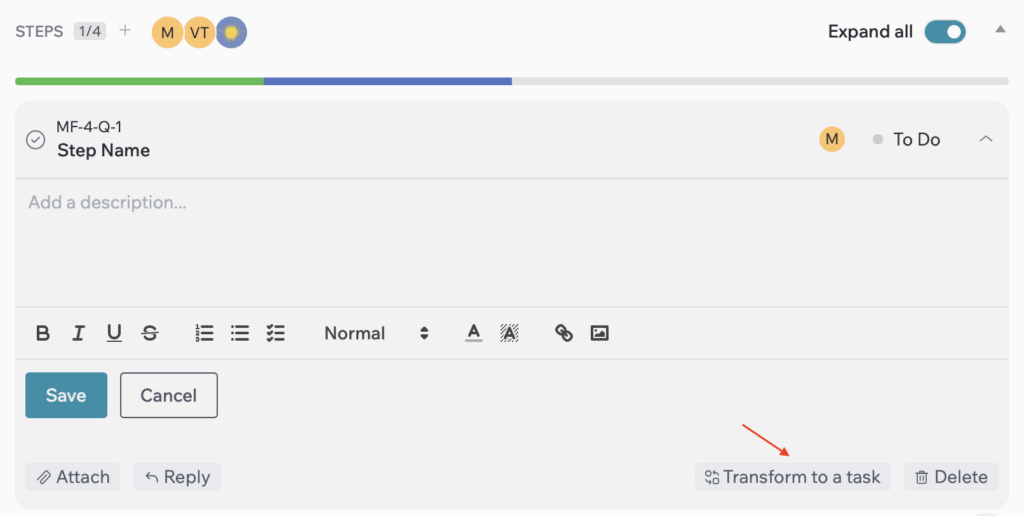
- Expand a step you want to transform.
- Click “Transform to a task” button.
- A confirmation window will appear – click “Yes” to proceed or “Cancel” to stop the action.
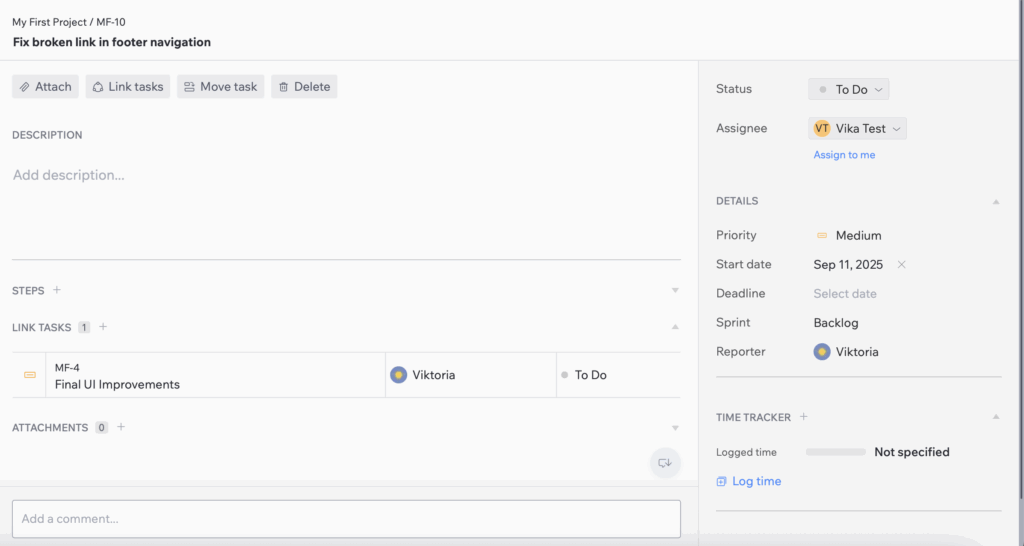
After that, the step will be transformed into a task in the same project with all details saved, including the description and assignee, and you will be redirected to the Task Page.
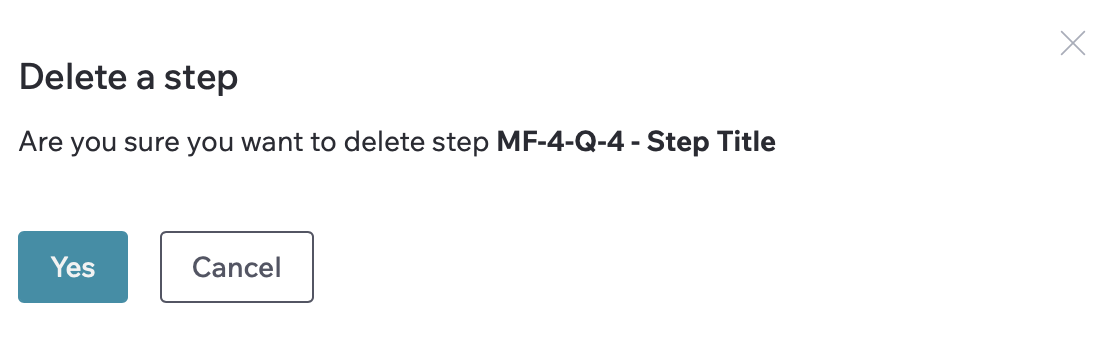
How to Delete Step
- Open the Steps block on the Task page or in Quick View.
- Click on the step you want to delete.
- Click “Delete”.
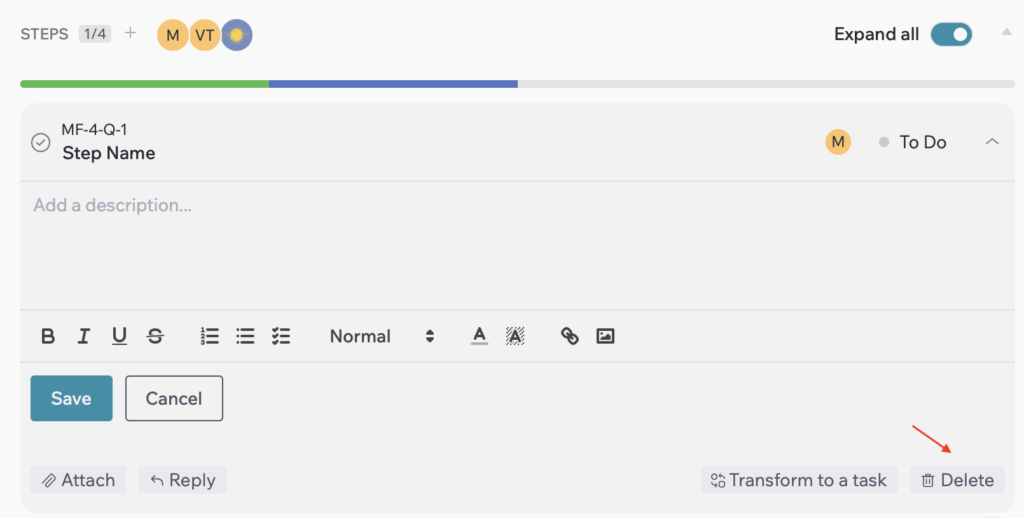
- A confirmation window will appear – click “Yes” to proceed or “Cancel” to stop the action.